We begin by selecting two images to morph, a beginning image and a final image.
1. Click the Import Image 1 button (![]() )
on the edit panel or choose Image/Import Image 1
menu.
)
on the edit panel or choose Image/Import Image 1
menu.

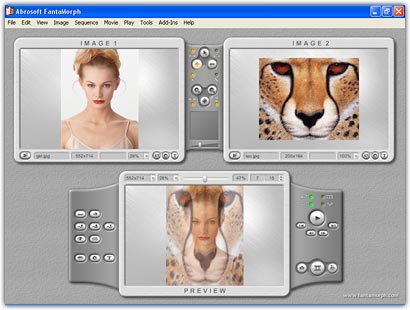
2. In the Import Image 1 window, choose a single image file. There is a preview panel on the right to help you make your selection. Your choice for image 1 will be the start image of the morph. In this example, the "girl.jpg" sample image, which is included with the FantaMorph package for demonstration purposes, will serve as the start image.

3. The selected image appears in the image 1 area in the main interface.

4. Click the Import Image 2 button (![]() )
on the edit panel or choose Image/Import Image
2 menu. Then in the import image
window, select "leo.jpg" sample image to serve as the final image of the morph.
You now have two images loaded into the image area.
)
on the edit panel or choose Image/Import Image
2 menu. Then in the import image
window, select "leo.jpg" sample image to serve as the final image of the morph.
You now have two images loaded into the image area.
Note, the morph movie will be created using default parameters; the middle frame
will be shown immediately. Because we have not added any key dots, the middle
frame is simply a cross-dissolve between the two images. We will improve the
morph in the following lessons.